The Sweet Solution to Post-Halloween Candy Overload
Halloween is a magical time filled with costumes, spooky decorations, and, of course, an abundance of candy. But once the trick-or-treating is over and the last ghost has vanished, many parents find themselves staring down a mountain of leftover sweets. These sugary treasures often linger in bowls, tempting little hands (and big ones!), and taking up valuable kitchen real estate. If you’re like Pamela, who found herself desperate to reclaim her mixing bowls from a sea of wrapped treats, you’re in search of a clever solution. Enter the brilliant idea of transforming that excess into a festive **halloween candy advent calendar** for Christmas! This isn't just a way to declutter; it's a creative, sustainable, and incredibly fun project that gives your surplus Halloween candy a meaningful second life, spreading joy from November through December. Instead of simply letting the candy sit and slowly disappear, this DIY approach turns it into a daily surprise, building excitement as your family counts down to Christmas morning. It’s a game-changer for managing the post-Halloween sugar rush and keeping the holiday spirit alive.Crafting Your Own Halloween Candy Christmas Advent Calendar: A Step-by-Step Guide
Repurposing your leftover Halloween candy into a Christmas Advent calendar is surprisingly simple and requires minimal supplies. The beauty of this project lies in its flexibility and the personal touch you can add. Here's everything you need and how to put it all together:Materials You'll Need:
- Leftover Halloween Candy: The star of the show! Sort through it and pick out your family's favorites, or a good variety for daily surprises.
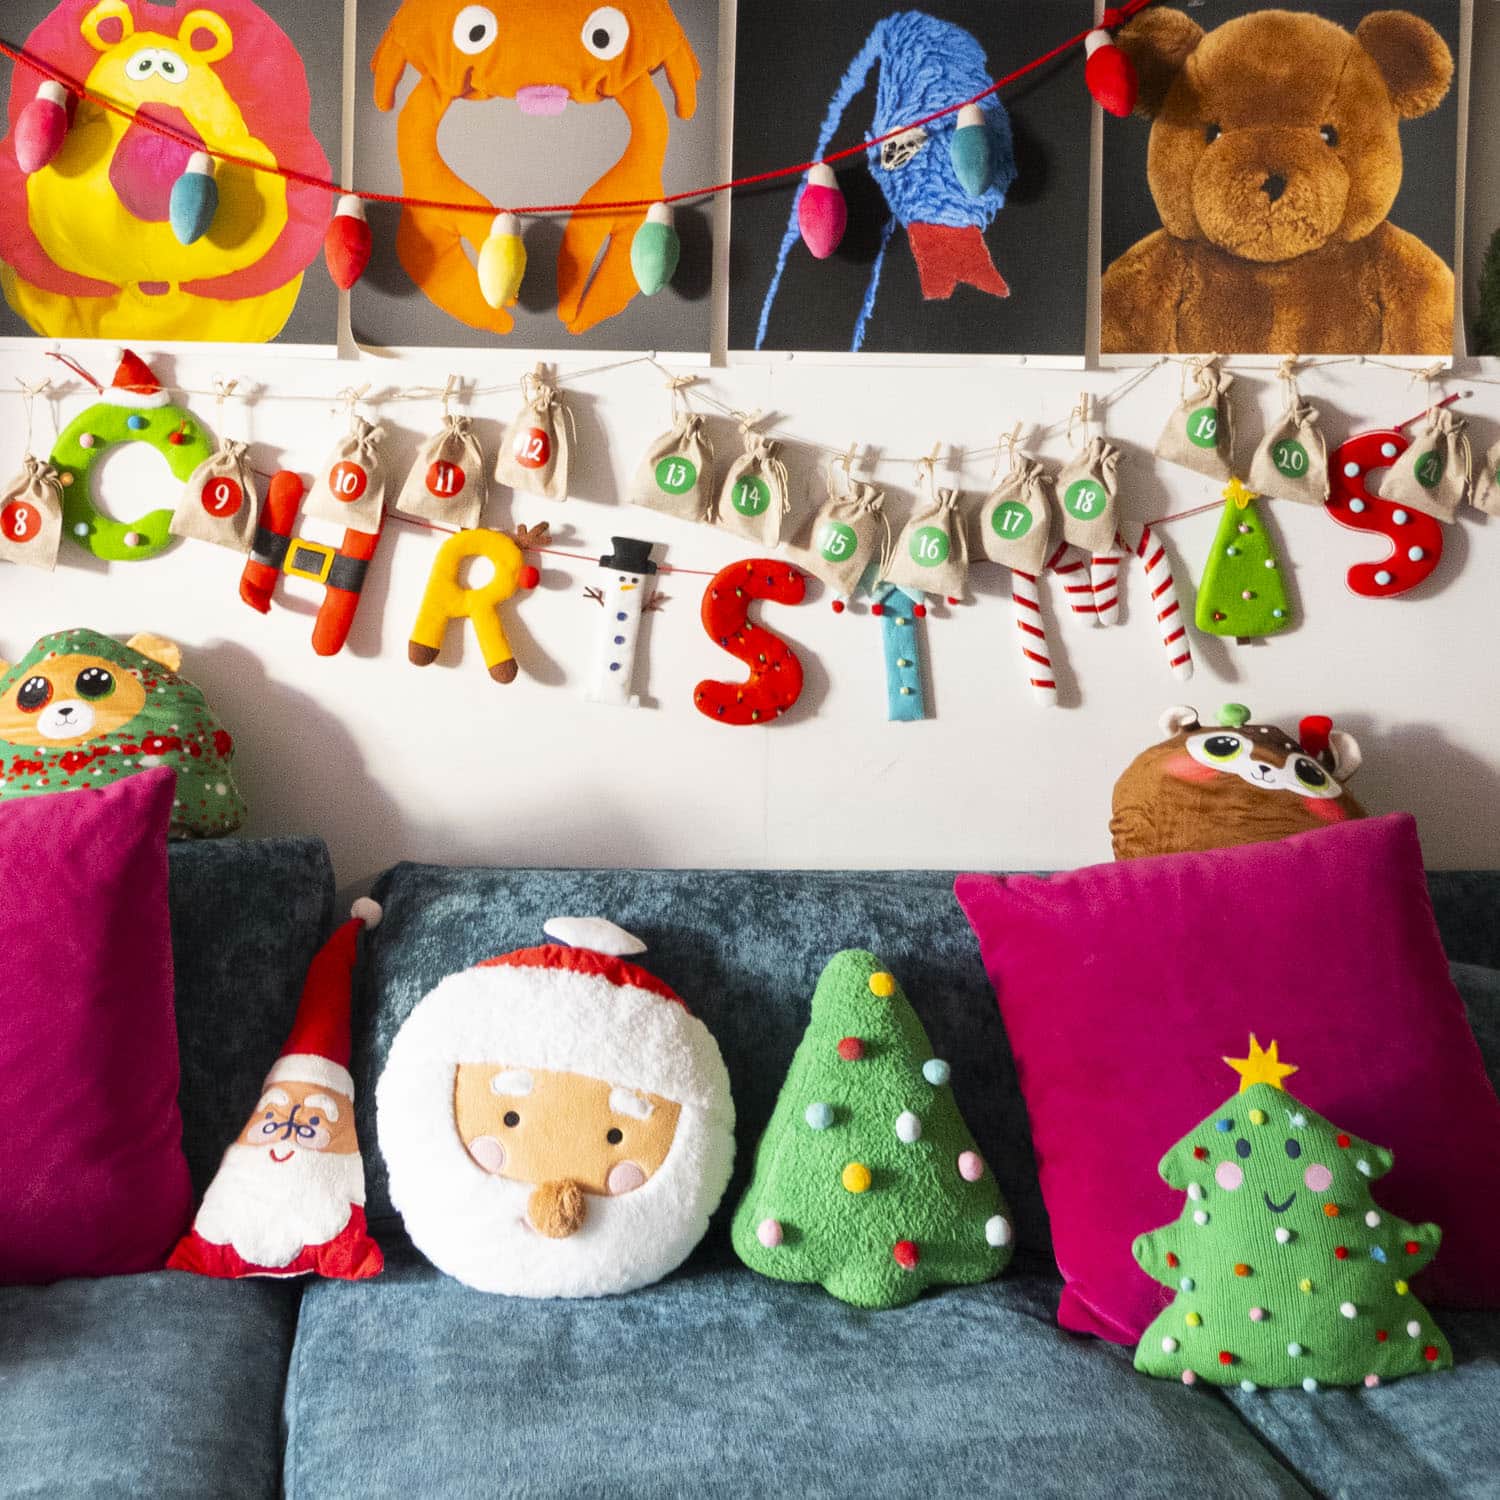
- Small Bags: Think burlap, muslin, small cloth pouches, or even sturdy paper bags. Burlap bags, in particular, lend a charming, rustic vibe to your holiday decor. These should be small enough to hold a few pieces of candy and be reusable year after year.
- Twine or Ribbon: A sturdy length of natural twine or festive ribbon will serve as the backbone for your calendar.
- Mini Clothespins: These are perfect for attaching the bags to the twine and are readily available at craft stores.
- Numbered Tags or Markers: To label each bag with a day from 1 to 24 (or 25 if you want a Christmas Day treat!). You can hand-write numbers on small paper tags, use stamps, or even paint numbers directly onto cloth bags.
Simple Steps to Create Your DIY Advent Calendar:
-
Prepare Your Candy Bags:
Decide how many pieces of candy you want to place in each bag. If you have multiple children, like a family with three kids, you might place three pieces in each bag so every child gets a daily treat. This ensures fairness and adds to the excitement. Fill each bag with the chosen amount of candy, then securely close the bags. Ensure no little fingers can peek inside!
-
Measure and Hang Your Twine:
Cut a length of twine or ribbon long enough to accommodate all 24 (or 25) bags, allowing for some spacing between them. Find an ideal spot in your home to hang your calendar. Popular locations include across a fireplace mantel, along a bare wall, or draped across a window frame. The goal is to choose a visible spot where your calendar can become a central part of your holiday decorations.
-
Attach the Numbered Bags:
Using your mini clothespins, clip each numbered bag onto the twine. You can arrange them chronologically, from December 1st to December 24th, or mix them up if you want to add an element of "seek the number" to each day's hunt. This can make the daily ritual even more engaging for older children.
-
Start the Countdown!
Beginning December 1st, let your children (or the whole family!) open one bag each night. The anticipation of discovering their daily candy treat makes the countdown to Christmas incredibly special and memorable. It transforms ordinary leftover candy into a daily moment of joy.
Pro Tip: To further personalize your calendar, consider adding small, non-candy surprises to a few bags, such as tiny ornaments, stickers, or even a slip of paper with a family holiday activity suggestion (like "bake cookies tonight!"). This adds variety and can help manage sugar intake while still maintaining the spirit of daily surprises.
Beyond the Basics: Enhancing Your DIY Halloween Candy Advent Calendar Experience
Keeping It Organized and Reusable
One of the best aspects of a DIY cloth bag calendar is its reusability. As the days pass and bags are opened, it's easy for them to get misplaced amidst the holiday hustle. Here's a smart tip:Bonus Tip: After your kids open each bag and enjoy their treat, either clip the empty bag back onto the twine in its spot or collect it immediately. This simple act helps prevent bags from disappearing into the abyss – because, let's face it, things tend to vanish quickly with kids around! Staying organized ensures your beautiful, reusable bags are ready to go for next year, making setup even quicker and more sustainable.
Personalization and Family Traditions
This DIY project offers a fantastic canvas for establishing unique family traditions. Instead of just candy, think about:- Mixed Surprises: Alternate candy with small, festive erasers, decorative buttons, or even personalized notes with "why I love you" messages for each child.
- Themed Days: If you have specific types of candy, you could designate "Chocolate Day," "Gummy Day," or even "Sour Power Day" for particular dates.
- Adding Activities: Slip in a small note suggesting a holiday activity for that day or weekend, like "watch a Christmas movie," "decorate the tree," or "write letters to Santa."
Comparing DIY to Store-Bought Options
While the market offers an array of ready-made Advent calendars, including spooky Halloween Advent calendars to buy for your spooky October countdown, choosing to DIY offers distinct advantages. Store-bought calendars, like those featuring individually wrapped gummies or character figurines, are often designed for October countdowns, offering fun for Halloween enthusiasts. However, a DIY **halloween candy advent calendar** repurposed for Christmas allows you to:- Control Contents: You choose the specific candy (or non-candy items) that your family loves, avoiding fillers.
- Reduce Waste: By using leftover candy and reusable bags, you're making an eco-conscious choice.
- Save Money: Leveraging items you already have is far more economical than purchasing a new calendar each year.
- Add Personal Value: The act of creating something together, or for your children, imbues the calendar with sentimental value that a mass-produced item simply can't match.
